
Your entryway is the first impression guests get of your home, and honestly, it’s often neglected. Too many homeowners treat the entry as mere traffic corridor, overlooking its potential to set the tone for the entire house. The good news? Transforming an entryway doesn’t require a gut renovation or deep pockets. With strategic paint, smart storage, updated lighting, and thoughtful decor, even a cramped or dated entry can become a welcoming, functional space. This guide walks through seven practical ideas that deliver real impact without very costly. Most of these projects are weekend-friendly, though a few may call for professional help. Let’s get started.
Table of Contents
ToggleKey Takeaways
- Paint is the fastest and most cost-effective way to transform entryway ideas, with a fresh coat costing under $100 and deliverable in just one or two days using quality interior latex paint.
- Smart storage solutions like floating shelves, wall-mounted coat racks, and slim console tables maximize functionality without cramping small entryway spaces.
- Upgrading lighting to 800-1,000 lumens with warm-toned LED bulbs (2,700K) improves both safety and visual appeal while reducing energy costs.
- Strategic decor including statement mirrors, console tables, wall art, and durable rugs adds personality and defines the entry zone as an intentional, welcoming space.
- Luxury vinyl plank (LVP) flooring at $2-$5 per square foot is the ideal DIY-friendly option for entryways due to its moisture resistance and easy installation.
- Most entryway improvement projects are weekend-friendly and don’t require professional help, making it feasible to create a polished first impression on any budget.
Make a Statement With Paint and Wall Treatments
Paint is the quickest, cheapest way to transform an entryway. A fresh coat of quality interior paint on walls or trim costs under $100 in most cases and takes a day or two to complete. Before you pick a color, consider the light in your space. North-facing entries stay cooler and benefit from warm tones like warm whites, soft golds, or muted terracottas. South-facing entries can handle bolder or cooler hues, think soft greens, pale blues, or even charcoal grays.
Prep is everything. Fill nail holes with spackling compound, sand glossy surfaces lightly with 120-grit sandpaper, and prime any raw drywall or stains (shellac primer works best for water stains). Use a quality interior latex paint (not builder-grade) in eggshell or satin finish, glossier finishes show fingerprints, but flat paint won’t wipe clean near your entry door.
Consider a feature wall or accent color if your entry is tiny. Painting just the back wall or a niche draws the eye inward and makes the space feel intentional, not like an afterthought. If your entry opens directly to a main living area, pick a color that complements the adjacent room to avoid a jarring visual break.
Wallpaper, shiplap, or wainscoting add personality, but they require more prep and effort. Wallpaper removal is tedious (usually takes scoring, steaming, and scraping). Shiplap installation involves measuring, cutting 1×6 or 1×8 boards, fastening them with brad nails or screws, and finishing seams. Wainscoting, typically 3 feet to 3.5 feet high, involves paneling, cap rail, and baseboard, so factor in time and accuracy. These are doable DIY projects, but they’re not quick fixes.
Maximize Storage Without Sacrificing Style
Entryways are clutter magnets. Shoes, jackets, bags, keys, and mail pile up fast. Smart storage keeps the space functional and visually clean. The key is fitting storage into a small footprint without making the entry feel cramped.
Floating shelves above a console table or bench work well for shoes and baskets. A slim 36-inch-wide console table fits most hallways and provides a drop zone for keys and mail. Pair it with a shallow bookcase (12 to 15 inches deep) to avoid blocking sightlines. Hooks on walls, either wooden pegs or metal hook racks, hold coats without eating floor space. Aim for hooks about 60 to 66 inches high so hanging coats don’t brush heads as people pass.
Wall-Mounted Solutions for Small Spaces
For tight entries, wall-mounted storage is your friend. A wall-mounted coat rack with hooks and shelves combines function with a finished look. Measure your wall space carefully: a typical 3-hook rack is about 30 inches wide and 15 inches tall. Locate studs with a stud finder and anchor hooks securely with wood screws into studs or toggle bolts if studs aren’t available. Drywall anchors alone won’t hold coats and bags safely.
A narrow wall-mounted mail organizer (usually 10 to 12 inches wide) keeps papers from piling on a table. Over-the-door organizers work too, though they’ll catch your eye every time you open the door, consider your tolerance for visual clutter.
Built-in benches with storage underneath maximize a corner or wall. A bench is 16 to 18 inches tall and deep, with a hinged or removable seat. This requires carpentry skills (or hiring a carpenter), but it adds real value and function. If DIY feels like too much, prefab bench options are available at home centers and online: assembly usually takes a few hours.
Upgrade Your Lighting for Impact and Function
Dim, uninviting lighting kills an entryway’s charm. Good lighting also improves safety, you need to see steps, uneven thresholds, and potential tripping hazards. Ideally, aim for 800 to 1,000 lumens in a small entry, or about 50 lumens per square foot. That’s roughly equivalent to three to four standard 60-watt incandescent bulbs, but LED alternatives give the same brightness at a fraction of the cost and heat.
A ceiling-mounted fixture, flush mount or semi-flush, is the baseline. If you’re replacing an existing fixture, the job is straightforward: turn off power at the breaker, disconnect the old fixture, run new wires if needed (watch building codes for wire gauge and support), and install the new one. If there’s no fixture or you’re adding a second light, you may need to run electrical wiring, which requires a permit and licensed electrician in most jurisdictions.
A wall sconce on either side of a mirror adds brightness and visual interest. Sconces mounted 60 to 66 inches high work well. They’re wired similarly to ceiling fixtures but often require cutting into drywall to route wires through studs.
Consider color temperature: Warmer light (2,700K) feels inviting: cooler light (3,000K to 4,000K) is more functional. Warm white is the safe choice for a welcoming entry. If you’re installing dimmers, pair them with dimmable LED bulbs, many older LEDs flicker at low levels. Modern dimmable LEDs don’t have that problem.
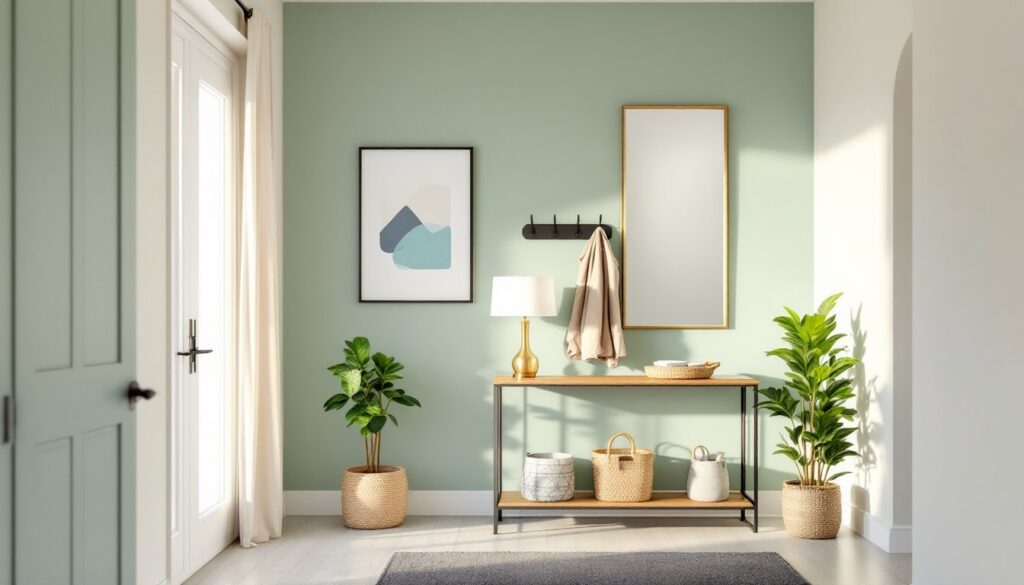
Add Personality With Strategic Decor and Accessories
Now for the fun part, decor. A few well-chosen pieces make an entry feel intentional and inviting. Start with a statement mirror: tall, framed, positioned opposite a light source to bounce light around the space. A 24 to 30-inch-wide mirror is typical for single walls: larger mirrors open up tiny entries visually. Hang it at 57 to 60 inches from floor to center so most adults can see themselves comfortably.
Add a console table or accent piece: wood, metal, or glass depending on your style. Pair it with a table lamp (about 20 to 24 inches tall) for warmth and function. A basket or tray below the table catches mail, hats, or gloves.
Wall art, a gallery wall, single large piece, or abstract print, adds character. Keep the color palette in mind (it should echo your wall color, not clash). Pieces of art can reference modern design or timeless classics: browse inspiration at resources like modern interior design ideas to see what resonates with your aesthetic.
A small plant or two humanizes the space and improves air quality, though remember they need light. Low-light tolerant plants like pothos or ZZ plants work if your entry lacks windows.
Finally, a statement rug or runner defines the entry zone and adds warmth underfoot. A 3-by-5-foot or 2-by-4-foot rug works for most entries: runners (24 to 36 inches wide, 4 to 8 feet long) suit narrow hallways. Choose durable, stain-resistant material near your door.
Choose the Right Flooring and Entry Rug
Entryway flooring takes a beating: wet shoes, dirt, tracked-in grime, and heavy foot traffic. Whatever you choose needs to resist moisture and staining while being easy to clean.
Luxury vinyl plank (LVP) is the go-to DIY choice. It mimics hardwood or tile, resists moisture better than real wood, and costs $2 to $5 per square foot installed. Installation is straightforward: acclimate the planks in the space for 48 hours, lay them out, cut pieces with a miter saw or circular saw, and click them together. No glue or nails required for floating LVP. A basic entry (50 to 80 square feet) is a weekend project.
Ceramic or porcelain tile is durable and moisture-proof but requires grout maintenance and can be slippery when wet. Installation demands a wet saw, trowel, level, and grout float, doable, but slower than LVP. Expect to hire a pro unless you’ve done tile work before.
Hardwood looks beautiful but won’t tolerate standing water. If you go hardwood, place a door mat and entry rug immediately inside to catch moisture.
Whatever your flooring, layer a rubber-backed rug or runner inside the door. This catches water and dirt before they reach your main floor. Rubber backing prevents slipping on hard floors. Look for washable or easily wipeable rugs in darker colors that hide dirt. If your floor gets wet regularly (snowy climates, rainy regions), invest in a higher-quality entry rug: cheap ones fall apart fast.
For a quick, no-install solution, simply upgrade your rug and add a few throw pillows to seating. That refresh won’t transform the space as much as new flooring, but it costs under $100 and feels fresh.
Conclusion
Transforming an entryway doesn’t require hiring a designer or spending a fortune. Start with paint and lighting, both deliver immediate impact and are affordable. Layer in storage, decor, and flooring upgrades based on your budget and skill level. Most of these projects fit the DIY wheelhouse, though electrical work, permits, and structural changes warrant professional help. The result is a functional, inviting entry that makes you happy every time you walk through the door and leaves guests with a lasting positive impression of your home.