A kitchen remodel is one of the biggest home improvement investments a homeowner can make, and one of the most rewarding. Whether you’re modernizing outdated cabinetry, fixing a dysfunctional layout, or dreaming of a complete overhaul, the difference between a smooth project and a disaster often comes down to planning. Kitchen remodel planning isn’t glamorous, but it’s the foundation that keeps costs in check, timelines on track, and stress at bay. This guide walks you through the essential steps to go from “I want a new kitchen” to holding the keys to a space you’ll actually love to cook in.
Table of Contents
ToggleKey Takeaways
- Successful kitchen remodel planning requires defining clear goals and a realistic budget upfront—ranging from $5,000–$15,000 for cosmetic refreshes to $100,000+ for full gut renovations—with a 15–20% contingency buffer for unexpected costs.
- Assess your current kitchen layout against the classic work triangle (stove, sink, refrigerator) and measure existing conditions carefully to prevent costly mistakes and inform better design decisions.
- Choose durable materials and finishes based on maintenance requirements: consider engineered quartz and luxury vinyl planks for low-maintenance longevity, and let finishing touches like hardware and backsplash define your style affordably.
- Layer lighting strategically with ambient, task, and accent lights—especially under-cabinet LEDs—since bad lighting frustrates even a beautiful kitchen during daily use.
- Hire experienced professionals with written estimates and clear contracts; obtain necessary permits for electrical, plumbing, and structural work to ensure code compliance and protect your home’s value.
- Plan for disruption by preparing temporary eating areas and realistic timelines: minor refreshes take 3–4 weeks, mid-range remodels 8–12 weeks, and full renovations 16+ weeks with permit and lead-time delays.
Define Your Kitchen Remodel Goals and Budget
Before you tear out a single cabinet, get crystal clear on what you want to achieve and what you can actually spend.
Start by identifying your primary goals. Are you fixing a broken layout? Upgrading appliances? Increasing storage? Improving lighting? Refreshing the look? You might have multiple goals, that’s normal, but rank them by priority. A top-tier goal gets your budget first: nice-to-haves come after essentials are covered.
Next, establish a realistic budget. A minor cosmetic refresh (new paint, hardware, and a backsplash) might run $5,000–$15,000. A mid-range remodel (new cabinetry, countertops, flooring, and updated appliances) typically falls between $30,000–$75,000. A full, high-end gut renovation can exceed $100,000. These ranges vary widely by region, material choices, and whether structural work or permits are needed. Build in a contingency buffer, most contractors recommend 15–20% extra for unexpected issues like hidden water damage or discovered plumbing problems.
Decide whether you’re upgrading incrementally over time or doing everything at once. Phased projects can spread costs but may mean living in a partially finished kitchen longer. Full remodels are disruptive upfront but typically more efficient overall. Be honest about your comfort level with that disruption, especially if you cook daily.
Assess Your Current Space and Layout
Understanding what you’re working with prevents costly mistakes down the road.
Walk through your kitchen with fresh eyes. Note the existing appliance positions, electrical outlets, water lines, and any structural elements like load-bearing walls or support posts. Look at ventilation, does your range have adequate hood capacity? Check plumbing: older homes may have galvanized copper or PVC that needs updating during a remodel. Identify lighting gaps: many kitchens suffer from shadows over work areas or rely on a single overhead fixture.
Assess the current layout against the classic kitchen work triangle, the imaginary line connecting the stove, sink, and refrigerator. A tight, efficient triangle (roughly 12–26 feet total perimeter) minimizes wasted steps. If your layout forces you to cross the room repeatedly, that’s a note for the designer or contractor.
Look at storage honestly. Cramped cabinets, wasted corner space, or no pantry? These are solvable problems, but noting them now shapes your design choices.
Measuring and Documenting Existing Conditions
Grab a 25-foot tape measure and a notebook. Measure wall lengths (corner to corner), ceiling height, window and door positions, and the exact placement of appliances, outlets, and switches. Write down the dimensions of your current cabinetry, sink, and stove.
If you’re working with a designer or contractor, provide photos of the full room, close-ups of problem areas, and existing appliances. Note the year your home was built if you know it: older homes may have layout quirks (uneven walls, settled joists) that affect installation. Sketch a rough floor plan to scale, even if it’s just grid paper, it helps you and any professional visualize the space. Take photos of the current layout from multiple angles and from standing eye level, which is how you’ll actually see the finished space.
Choose Your Design Style and Materials
Design choices drive both the look and the longevity of your remodel.
Collect inspiration from multiple sources, magazine clippings, Pinterest boards, kitchen showrooms, and homes in your area. Notice patterns in what appeals to you: modern minimalism, farmhouse warmth, traditional elegance, or something in between. Your style should reflect how you actually live, not an aspirational fantasy. If you hate fussy details or deep cleaning, a high-gloss, ornate design will frustrate you daily.
Think long-term about material durability and maintenance. Granite and engineered quartz countertops are durable and lower-maintenance than butcher block, which needs regular oiling. Subway tile backsplashes hide fingerprints better than glossy finishes. Matte cabinet finishes are forgiving: high-gloss shows every smudge and requires frequent wiping. Hardwood flooring can be refinished but demands more upkeep than luxury vinyl planks, which mimic wood and resist moisture better in kitchens where spills happen.
Selecting Cabinetry, Countertops, and Finishes
Cabinetry typically eats 30–40% of a remodel budget, so this choice matters. Stock cabinets (ready-made, delivered in a few weeks) are affordable but offer limited customization. Semi-custom cabinets strike a middle ground: standard sizes with finish and hardware options, 8–12 week lead times, and moderate cost. Fully custom cabinetry is built to your exact specs but costs significantly more and takes 12+ weeks.
Countertop materials each have trade-offs. Laminate is budget-friendly but scratches and stains easily. Solid surface (like Corian) is durable and repairable but pricier. Butcher block is warm and beautiful but requires maintenance and isn’t ideal near sinks. Engineered quartz mimics stone, resists stains, and never needs sealing, a popular mid-to-high-end choice. Natural stone (granite, marble) is stunning but porous, variable in color, and demands sealing and care.
Flooring options range from budget vinyl to premium hardwood. Luxury vinyl planks (LVP) have improved dramatically: they’re waterproof, durable, affordable, and install over most existing floors. Ceramic or porcelain tile is extremely durable and moisture-resistant but cold underfoot and can be noisy. Natural stone is luxurious but expensive and porous. Consider your home’s overall style, traffic patterns, and how much wetness your kitchen endures before deciding.
Paint, hardware, and backsplash finishes are the “jewelry” of the kitchen, they define style without massive expense. A neutral cabinet color with contrasting hardware and a bold backsplash tile can feel contemporary. The same cabinets with brass hardware and subway tile read traditional. These finishing choices let you refresh the look without gutting everything when trends shift.
Plan Appliances, Lighting, and Workflow
Appliances and lighting shape how your kitchen actually functions day-to-day.
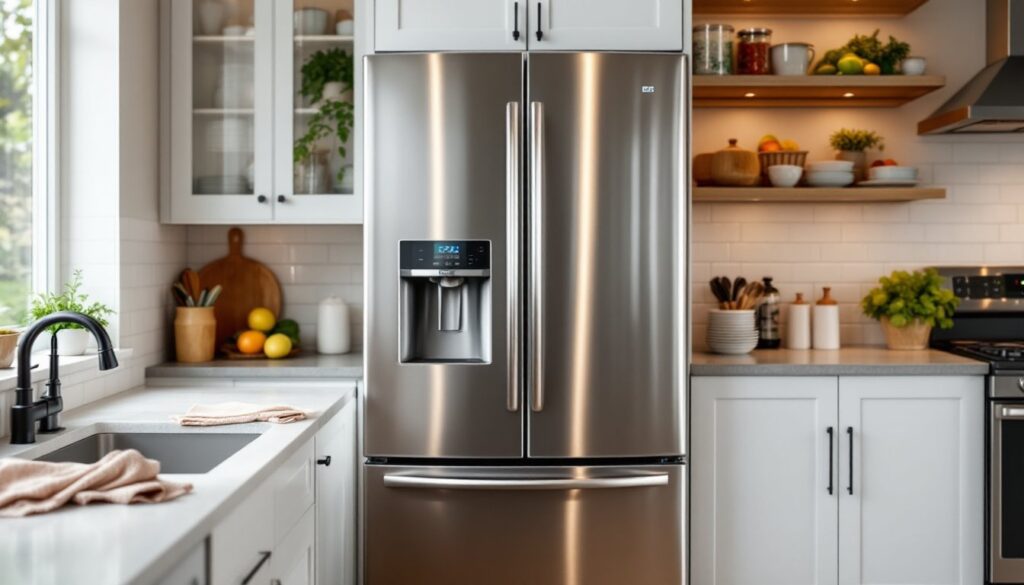
When choosing appliances, think about size, finish, and features. Standard appliances are 24–30 inches wide, but if your space or workflow demands it, consider slide-in or compact options. Stainless steel is durable and hides fingerprints reasonably well. Black or white finishes are also practical. Evaluate efficiency ratings, ENERGY STAR certified appliances cost more upfront but lower utility bills over time. A convection oven cooks faster and more evenly than conventional. A quiet dishwasher (44 decibels or lower) won’t disturb conversation in an open floor plan.
Lighting deserves serious attention because bad lighting makes even a beautiful kitchen frustrating to work in. Avoid relying on a single overhead fixture. Layer three types: ambient (general room lighting from recessed lights or a flush mount), task (under-cabinet or pendant lights over islands), and accent (spotlighting a backsplash or open shelving). Under-cabinet LED strips are affordable, energy-efficient, and transform workspace visibility. Pendant lights over an island create visual interest and functional task light. Dimmer switches on ambient lights let you adjust mood from bright work light to softer entertaining light.
Consider the work triangle again when placing appliances. If your stove, sink, and fridge form a logical path without crossover, meal prep becomes smoother. An island often serves as a prep zone, landing spot for groceries, and seating, invaluable in most layouts. Ensure the microwave, toaster, and coffee maker don’t fight for counter space or outlets. Plan dedicated zones: prep near the sink, cooking at the stove, plating near serving areas. This workflow planning prevents a beautiful kitchen from feeling cramped during actual use.
Electrical outlets matter more than you’d think. Modern kitchens need at least two 20-amp circuits for counter outlets (code in most jurisdictions) plus dedicated circuits for major appliances. If you’re adding an island, run circuits to it. Insufficient outlets lead to cluttered cords and overloaded power strips, which is both unsafe and unsightly. This is one area where code compliance isn’t optional, improper electrical work risks fire or injury.
Create a Timeline and Hire the Right Professionals
A remodeling timeline depends on scope and whether permits are required. A minor refresh might take 3–4 weeks: a mid-range remodel typically runs 8–12 weeks: a full gut job can take 16+ weeks. Add time for permit approval (usually 2–4 weeks), material lead times (especially for custom cabinets, which can be 12+ weeks), and unexpected discoveries once walls are open.
Decide early whether you need a general contractor, a designer, or both. A general contractor manages the entire project, hires subcontractors, obtains permits, and handles inspections, invaluable for structural changes, electrical work, or gas line rerouting. A kitchen designer specializes in layout, material selection, and aesthetics: some work with contractors, others independently. For a small refresh, a designer and independent contractor may suffice. For a full remodel, a general contractor experienced in kitchens is worth the coordination overhead.
Hire professionals deliberately. Get three written estimates from reputable contractors: never choose based on price alone. Check references, verify licensing and insurance, and ensure they’re familiar with your kitchen’s particular challenges (old homes, tight spaces, vintage layouts). Ask about their warranty, communication style, and how they handle changes. Some contractors price remodels as a lump sum: others use cost-plus (actual materials plus a markup). Clarify payment schedules, avoid paying in full upfront. A typical schedule is 10% at signing, 40% when framing is complete, 40% when cabinet and appliances are installed, and 10% on final inspection.
When inspecting estimates, verify what’s included: cabinetry, countertops, labor, appliances, flooring, tile, paint, hardware? What’s excluded? Hidden costs emerge when scope isn’t crystal clear. A written contract prevents most disputes. It should list every item, the total price, timeline, payment schedule, warranty terms, and how change orders are handled.
Consider whether you need permits. Most jurisdictions require permits for any electrical, plumbing, or structural work. A kitchen remodel almost always triggers permits because appliances, wiring, and plumbing are involved. Permits cost money (usually $300–$1000+) and add time, but they ensure work meets code and protects your home’s value and safety. Skipping permits on major work is risky, insurance won’t cover unpermitted work in a claim, and you may face fines or difficulty selling the home later.
Research local resources before committing. Home renovation cost guides and contractor networks can help you find vetted professionals in your area and understand typical project costs. References like kitchen design ideas and appliance reviews also offer inspiration and practical advice on material durability. For a comprehensive step-by-step approach, detailed renovation planning frameworks guide homeowners through each decision point.
Finally, plan for disruption. You’ll live with at least some kitchen construction mess for weeks or months. Prepare a temporary eating area, plan your dining habits during the project, and mentally brace for noise, dust, and loss of access to your main cooking space. Setting realistic expectations upfront keeps frustration lower when reality hits.